Hello, beautiful people! Sorry that I'm all over the post and actually have no real theme to this monster of a blog anymore but today I bring you a real life artistic/creative endeavor! I've been wanting to make something along these lines for a while but just haven't gotten to it and so finally on Monday I had the day off from work and decided a jewelry board would happen.

The finished product!
Please excuse the terrible picture quality, I'm out of practice and don't have photo editing software on this computer yet so I just cropped it in picmonkey and this is what we get.
Living where I do there are some kind of amazing thrift stores so I decided to hit those to find the base of my board, which I was hoping would be a big wood frame but actually ended up being a cork board because I found one at Goodwill for $1.98. The photo below looks something like it.
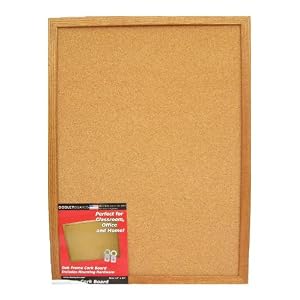
(via amazon)
This isn't really a tutorial so much as me telling you what I did in hopes that it might inspire you as well as allow you to learn from some of the silly things I did.
What I used:
-Thrift store cork board
-Paint and brush
-Hot glue
-Fabric from JoAnn
(My frame is approximately 20x24, I didn't measure, and I purchased .5 yards of cotton fabric and had a little to spare. This cost just under $2 but you could even get it cheaper if you have one of their % off coupons)
-Scissors
-Kitchen knife
-Hammer
-Nails
-Yarn
How I did it:
I painted the wooden frame with black acrylic paint that I had laying around, 2 coats, and finished it with some varnish that is made for wood and acrylic. Both of these were gifts but you really can't go wrong with any craft paint and some sort of finish to brighten up the color or in the case of black, just make it nice and shiny.
My idea was to staple the fabric to the board but I quickly realized that my mini stapler was not up to that challenge so I got creative and used my $3 glue gun. Because it was a cork board and not an empty frame I had to get a little creative with affixing the fabric and what I might tell you is to use an exacto knife. It'll make your life a lot easier! My idea was to glue the fabric down and then trim the excess off but that doesn't really work with a kitchen knife or scissors so I used the kitchen knife to push the fabric under the frame. (I might recommend not using a knife that you like..) This was fairly effective and I used some more hot glue to keep the fabric concealed.
After I was satisfied with the fabric in the frame the next step was to stretch the yarn across the frame. I chose string as opposed to some of the really cute mesh or net options because I like to keep backs on my shepherds hook earring and if I used mesh or netting I might not have been able to fit them on there. Also, with the backing, it would have been awkward to hang things from it. I had the yarn lying around that I got from my mom a while ago, just basic knitting yarn. You could also use twine or lace but I was going for cheap so free it is!
I tied the yarn to the nails them and simply hammered them into the edge of the frame. Word to the wise, do this not directly on top of your kitchen table in case you should happen to maybe puncture the back of the cork board and nail your project to your table. Not saying I did it...just that it might be a concern...Or, you can actually go to the hardware store and get some smaller nails which would have really been the intelligent thing to do.
Once the yarn was sufficiently suspended I took a few more of the handy Ikea nails that my roommate had lying around and nailed them along the bottom to hang necklaces, ect. I had considered using pretty knobs for this but I had a lot of necklaces that I wanted to hang and didn't feel that the nails were all too unattractive being that they had nice little rounded heads and were new and shiny. You could also simply use push pins if using cork board but some of my necklaces are a bit heavy.
Final step, hang jewelry, affix to wall, and admire.

Some favorite earrings of mine and a close up of the fabric.

Above you can see the nails better. I preferred having fewer necklaces per hook than many and having fancier hooks but having to crowd the necklaces.

The view from my night stand. I know, my Roman soldier duck is pretty much the cutest thing ever!
Please feel free to comment with any questions or perhaps words to the wise for future projects or others looking to make a similar project!

No comments:
Post a Comment